(Click on photos for larger image)
This is my install of a Hurst Line-Lock on a 2001 Z06 Corvette. I wanted a mount and location that was out of the way and would hold the Line-Lock ridged so it would not move or vibrate and not require a lot of extra brake lines. The location I picked was right under the master cylinder. I cut a custom bracket cut from 1/4" aluminum plate that would mount to the same bolts that held the master cylinder. The bracket had to be offset slightly to clear the front of the brake booster and the bolt holes had to be recessed slightly so the master cylinder nuts had plenty of threads. I used a Eastwood Powder Coating kit to coat the bracket. I'm impressed with this kit! I used their Hi-Tech Translucent Anodized Blue color and it looks great. I could not find a 12mm x 1.5 bubble flare adapter to fit the master cylinder so I cut the end off the factory line and installed a standard 1/4" inverted flare on the end so it would fit directly into the Line-Lock. Then I drilled out the factory 12mm x 1.5 bubble flare nut which was 6mm to 1/4" and installed it on a short 1/4" brake line and bubble flared the end to fit the master cylinder. This allowed me to use standard 1/4" inverted flare to 1/8"NPT adaptors at the Line-Lock. Below is photos of the install.
|
|
 Line-Lock_Plate-01.JPG |
This is my custom bracket fresh out of the toaster oven. This is the Anodized Blue power coat from Eastwood. This part was my first ever attempt at power coating, but this was my second attempt on this part. On the first attempt I didn't realize just how translucent this blue was. My bracket had lots of small dents and dings which the power coat filled but made dark blue marks anywhere the coat filled and was thicker. So I simply sanded down the part again and coated it with the Smoked Chrome color which is included in their Hi-Tech color sample kit. This gave my part a even shiny coat which I then again coated with the Anodized Blue and this time it came out flawless. The best part of power coating is you don't have to wait for the part to dry after coating like you do with paint. You simply have to wait for the part to cool, which on this aluminum part was less than 5 minutes! |
 Line-Lock_Plate-02.JPG |
Here you can see the color
of the part and that it is very translucent. As you can see where
the light reflects the color is light blue and where the light don't
reflect the color is darker blue. It's really hard to get a good
photo of this part. The camera just does not reflect the true color
and how good this part really looks. You can see the three mounting
holes for the Line-Lock are offset to the right. This allows for
the Line-Lock to be placed higher slightly beside the bottom of
the master cylinder. There is not much room for mounting so everything
has to be precisely placed. The power coat finish is very tough,
even though I had bolts in the mounting holes when I applied the
coating I had to run a tap though the holes to clear out the coating
after it cooled. |
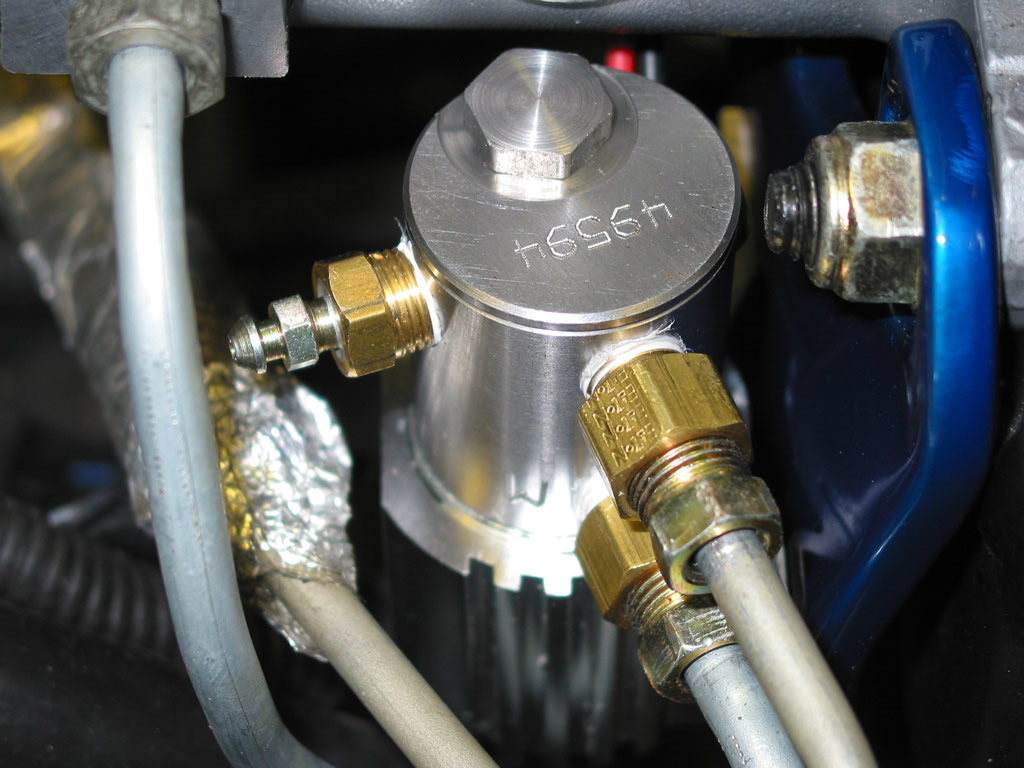
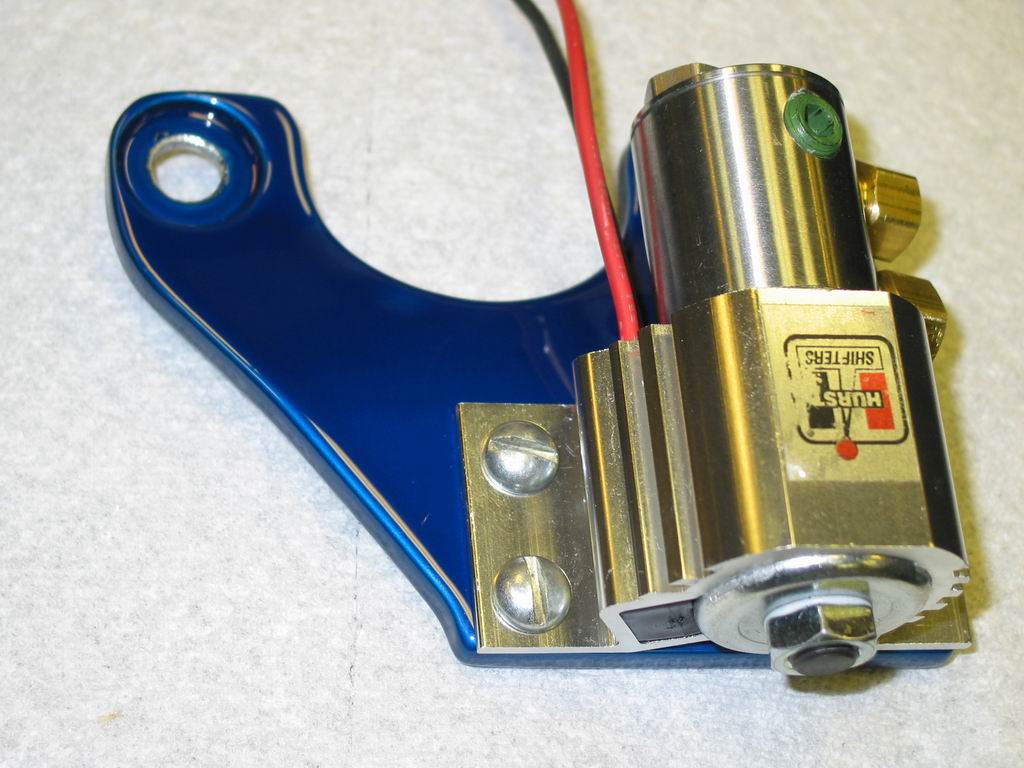 Line-Lock_Plate-03.JPG |
Here is the bracket with
the Line-Lock installed. I know, I need to get some pretty stainless
steel socket head screws! Again you can see the color change from
light to dark where the light reflects. |
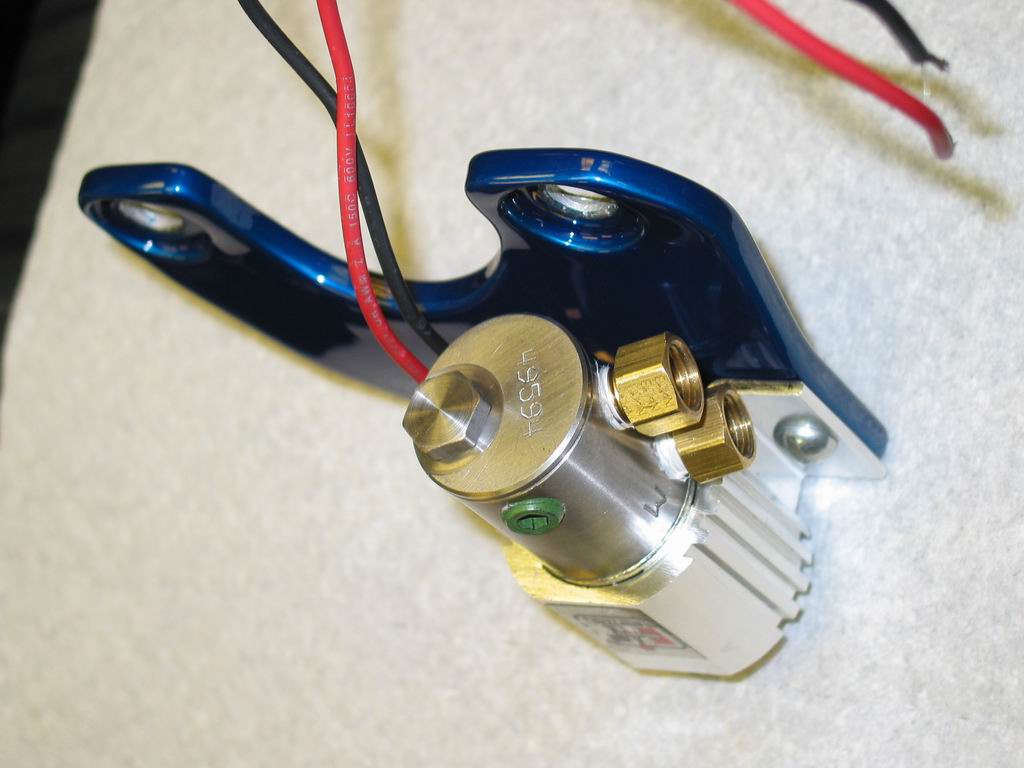 Line-Lock_Plate-04.JPG |
Here you can see the offset
I had to bend into the bracket to clear the front of the brake booster.
The master cylinder is recessed into the front of the booster enough
if the bracket was not offset it would contact the booster and prevent
the bracket and master cylinder from being tightened up correctly.
You can also see the 1/4" inverted flare to 1/8"NPT adapters
installed in the Line-Lock. They are turned slightly to the rear
to clear the windshield washer reservoir. Very little extra room
under a C5 hood! |
 Line-Lock-01.JPG |
Here you can see the Line-Lock
is installed out of the way, away from the engine. The bracket looks
almost factory! |
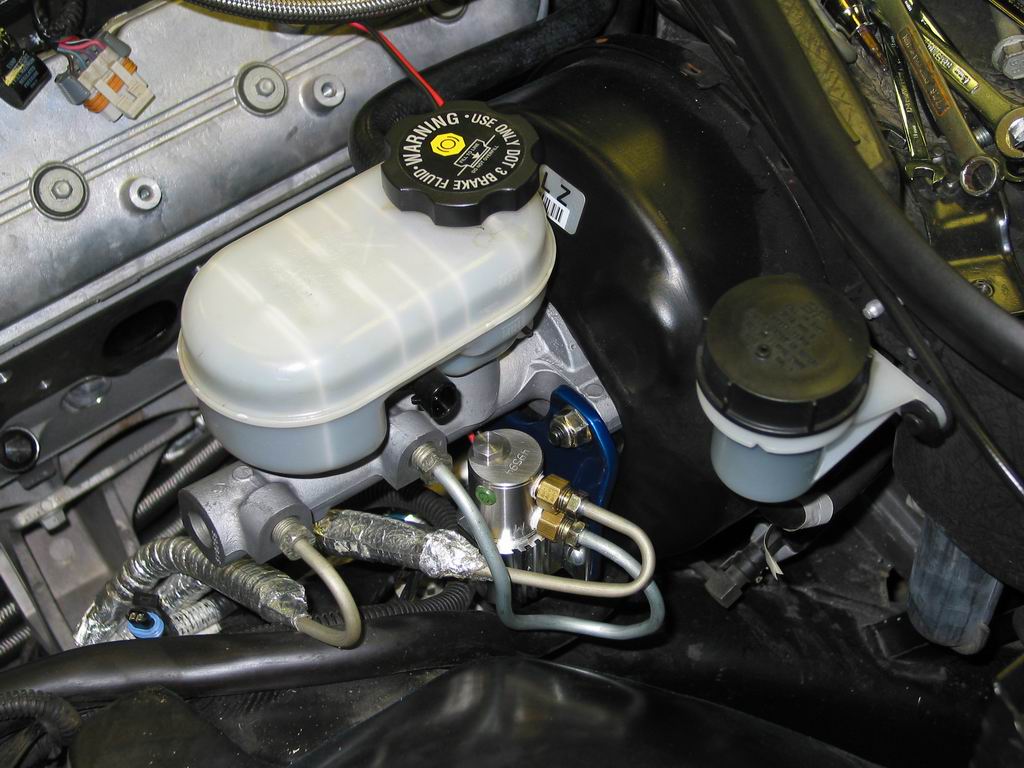 Line-Lock-02.JPG |
The install is almost
complete! You can see the Line-Lock is off set left of the master
cylinder and just high enough to still install the master cylinder
mounting nut. This space is normally unused, nothing had to be moved
to position the Line-Lock in this location. It don't look like the
Line-Lock will get in the way of any normal maintenance. Almost
looks like a factory item! |
 Line-Lock-03.JPG |
Hook up is very simple.
The Line-Lock is installed in the rear most line of the master cylinder
which is labeled MC1 on the ABS block. Since I could not find an
adapter anywhere that would fit this master cylinder I simply cut
off the factory 12mm x 1.5 bubble flare and installed a standard
1/4" inverted flare which fit directly into the top port on
the Line-Lock. I then drilled out the factory 12mm x 1.5 fitting
which was 6mm so it would install over a standard 1/4" brake
and bubbled flared the end. This allowed the master cylinder port
to be hooked directly to the bottom Line-Lock port. The extra ports
on the Line-Lock was plugged with 1/8" steel hex socket pipe
plugs. |
 Line-Lock-04.JPG |
Now with the windshield
washer reservoir installed you can see exactly how tight the space
was to fit in the Line-Lock. The brake lines pass just under the
corner of the reservoir without touching. |
Update:
I found a direct fit brake bleeder to fit the normally plugged top
plug on the Hurst Line-Lock. The Motormite company makes a bleeder
repair kit with a brake bleeder that screws into a 1/8"NPT.
This can be found under the "HELP" (the little red parts
packages) section at your local auto part store, the part number
is 13960 and the cost is under $5.00. A bleeder at this location
guarantees that no air could stay trapped in the Line-Lock itself. |
|
Now that the Line-Lock is installed I'm off to start the next mod... |
|

Saturday, November 23rd, 2024
Copyright ©2024 SpeedyZ
ALL RIGHTS RESERVED
Page count is